Thursday, 25 October 2012

Sauerkraut

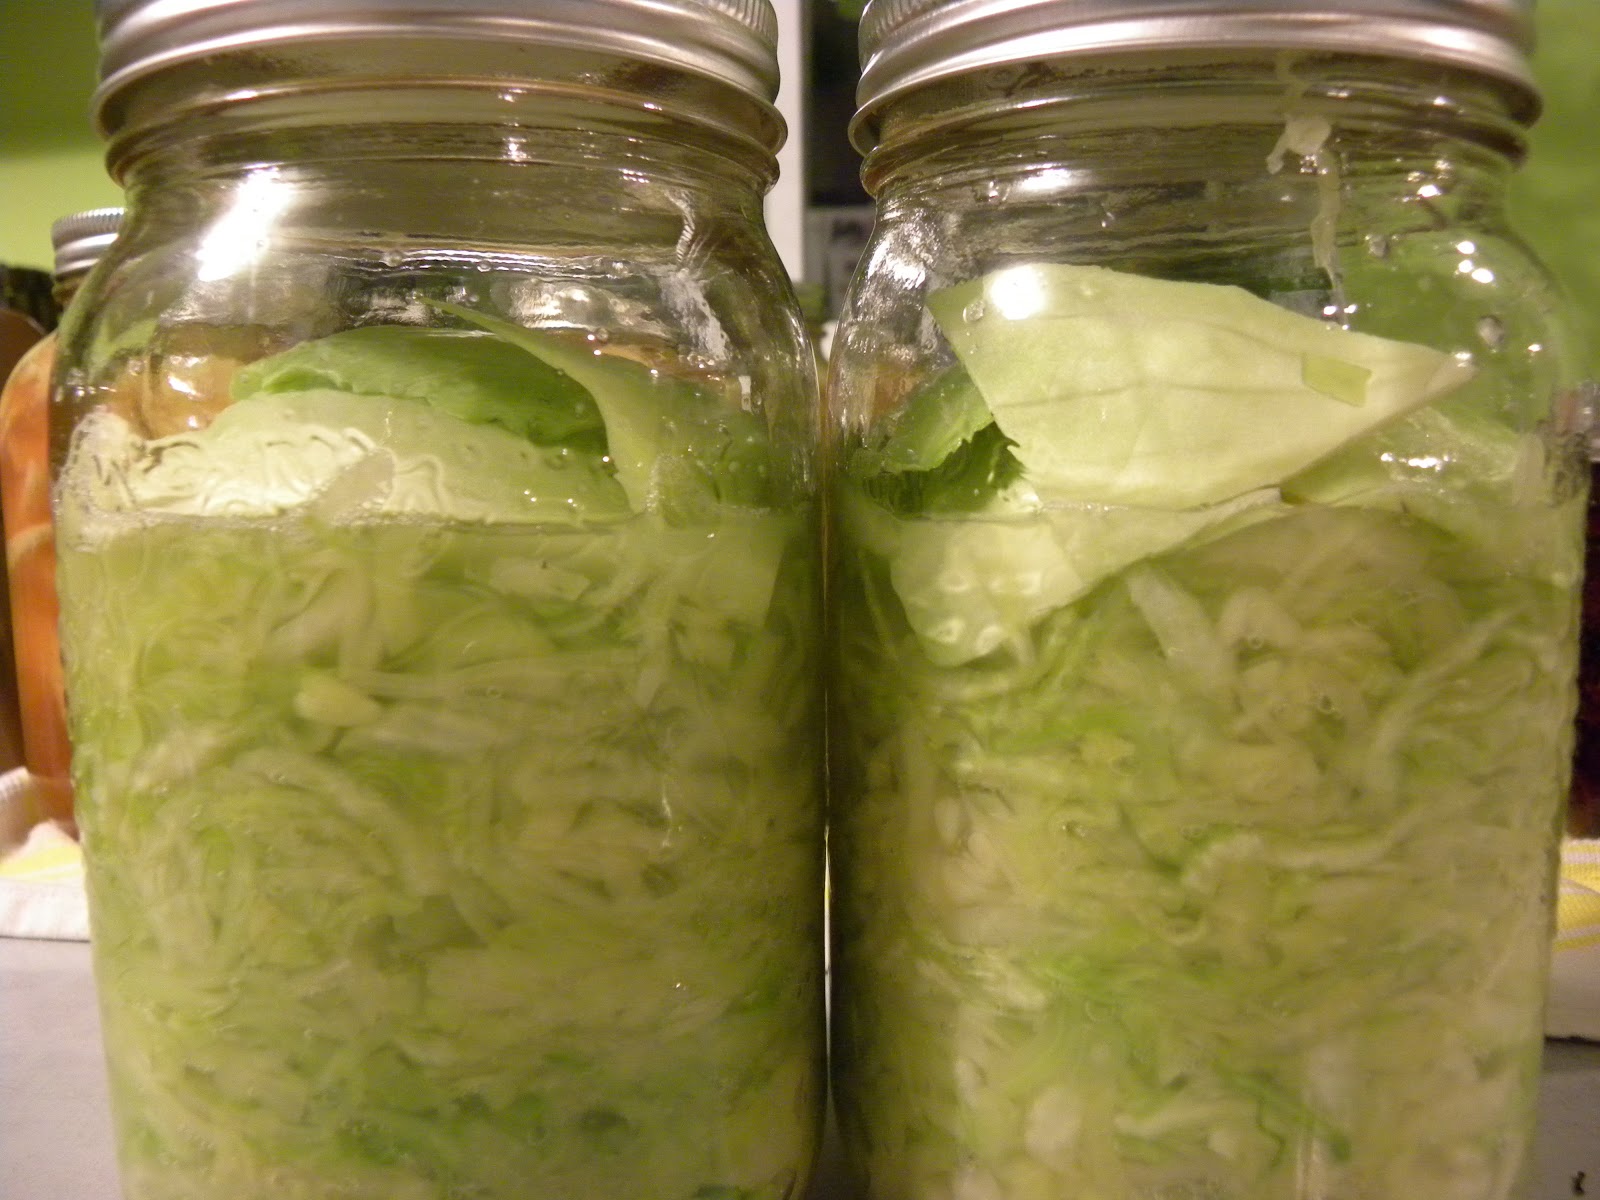
Sauerkraut - Day 1. Will add "after" picture when it's ready!
Growing up in a family where both sides are Mennonite through and through, Sauerkraut is no stranger to me. I'm always surprised when I hear that someone has never had sauerkraut, or is a little afraid of it due to it's "fermented" nature. It's quite the lovely condiment. True, I'm not as adventurous with it as some - I prefer to keep it simple. On hot dogs, with sausage, on top of pierogies, next to baked beans. It adds a mild sour tang, and a fantastic little crispy crunch! Mmm!

In keeping with this year's culinary theme of "A Stocked Homemade Pantry" (I didn't even realize that was the culinary theme of my year until just now. I didn't even know my year's HAD culinary themes!), I decided to try fermenting my own sauerkraut. With cabbage from my very own garden! *Side note: In my opinion, if the items in your freezer/pantry/jam jars aren't local or from your own yard, what's the point? You can get grocery-store strawberries all year round, there's no need to preserve THOSE cardboard-y things.*

If you feel like trying, it's actually quite simple. You don't even need a real 'recipe'. Just basic instructions:

1) Thinly slice some clean cabbage, reserving a few whole leaves, and put it in a large bowl and sprinkle it generously with some kind of coarse salt - maybe about 1 1/2 Tbsp. per small head of cabbage.
2) Let it sit for 20-40 minutes - you're looking for some water to start leaking out. Massage the cabbage and squeeze every now and then to extract as much water as possible.
*At this point you may no think you have enough water to cover the cabbage. Don't worry, it'll happen!*
3) Start packing the cabbage into litre jars, pressing down on the cabbage with as much force as you can muster every few layers, to release more water. When the jars are pretty much full, put a whole leaf or two on top of the cabbage to cover it. Smack the lid on that sucker and put in a cool, dark place.
4) Every 5 days, slowly open the jar to release some of the pressure, and then really quickly close it again. Somewhere around day 21 you can start tasting it. When it's at a strength you enjoy, pop it in the fridge and consume at will.

Tuesday, 23 October 2012

Squash Cake with Cinnamon Whipped Cream


Thanksgiving may be over here in Canada, but we still have American Thanksgiving AND Christmas ahead of us. If you're on dessert-duty for one of these occasions this year and you're thinking "Everyone loves pumpkin pie, but sometimes after a big meal even that feels too heavy" then here's the cake for you!

It's a French cake, in that there's no leavening agent (read: baking powder/soda etc.) - the rise of the cake comes entirely from beaten egg whites. Another reason this cake is unique is the Corn Flour. That's right, this baby is gluten free (hip-hip hooray!). A unique mix of corn starch and corn flour are the 'dry' ingredients in this cake, and it gives it a more smooth, pumpkin-pie filling type texture. Not so much with the fluffy and the crumbs, which in my opinion is a grand change!

This recipe is from one of my favorite cookbooks, French Taste by Laura Calder - you can find it here. Making it is a breeze and hardly takes any time at all. Orange zest and rum (I use dark spiced) perk up this cake and make it a real treat for dessert or breakfast ;) I've made this cake twice, once with pumpkin and once with butternut squash and I have to say: the squash is my favorite. It's a milder squash-y flavor and come on, look at that gorgeous yellow batter! Top it off with some cinnamon whipped cream and you've got yourself a new holiday favorite! Virtually guilt-free.

Monday, 22 October 2012

Frittata

I really wanted to title this post "Leftovers" Frittata, because honestly that's what it is. But I figured a lot fewer people would read it if I did.

One of the things I'm learning about being frugal in the kitchen is the value of all the tiny portions of leftovers that some cooks might just throw away, and eggs.
A few tablespoons of leftover mashed squash, a spoonful of sauteed peppers and onions, a handful of chopped spinach - and voila! Frittata. The extras can be anything you happen to have left in your fridge. A cup of rice. Steamed broccoli. You could even strain leftover chunky soup and throw that in there too.

Once you have your leftovers gathered, whisk some eggs in a bowl. I'd say don't go fewer than 4, but it depends on your pan size and how many people you're trying to feed. Around 1 1/2 eggs per person. To the eggs add a generous splash of cream or milk (if you have some), a large grating of cheese (whatever kind you have!) and season well with salt and pepper.

Heat up an oven proof skillet and turn your oven to 375'. Over medium-high heat, add a dollop of butter - or even better, bacon fat! - and add your veggies once it's hot, just to give them a head start on warming up. Once they're reheated, switch the heat to medium-low and add your eggs. Let it bubble for a few seconds, just until a 'crust' starts to form on the bottom. Then pop that thing in the oven and bake for 20-30 minutes, depending how big you frittata is. It's done when it stops jiggling. Ta-da! A frugal lunch that is healthy and delicious!


Monday, 10 September 2012

Bulgur Salad


There's a fantastic sandwich shop in Gastown called Meat & Bread. They are famous for their Porchetta sandwich - roasted pork belly, cracklin's, and salsa verde on a freshly baked panini bun. If you are ever in the area, you really have to go there. And get the Ice Cream sandwich while you're there. Trust me. It's no regular sandwich.

The last time I was there, they had this amazing side salad - it was Almond Bulgur, with a fantastic Morrocan-esq dressing. This is my attempt at recreating it.


Almond Bulgur Salad

1 cup of cooked bulgur (there seem to be a few different methods on how to cook bulgur - I recommend buying a box/bag of it and just following their instructions)
4 sticks celery, chopped
1 apple, chopped (use one that's more on the tart side)
1/4 cup dried apricots, chopped
1/2 cup escarole or red cabbage, cut in long-ish strips
1/2 pepper, chopped
2 Tbsp. sliced almonds

- Mix all ingredients in a bowl, and then dress with the following dressing:

1/2 cup mayo
3 Tbsp. white wine vinegar
1 Tbsp. olive oil
1/4 tsp. garlic powder
1/2 tsp. cinnamon
1/4 tsp. cumin
salt + pepper to taste

- Whisk well, and adjust mayo/vinegar ratios to suit your taste


Thursday, 6 September 2012

Cassoulet


Cassoulet is a French dish typically made with some kind of meat and white beans. I like to think of it as the older, more sophisticated relative of Chili. (Does that make me sound like a snob? I do love a good chili, honest!)

I've been getting tired of the end-of-the-month scramble for a cheap dinner that is relatively healthy, so I decided to use those same frantic money-saving tactics at the START of the months, in hopes that we could eat a little more luxurious later on. Or at least save some cash for next month.

I happen to have a LOT of beans in my house. I always buy them because they're really cheap, but I'm not overly fond of them so usually they get pushed to the back of the pantry whenever possible. In my digging this week I came across a bag of white beans! These are probably the least offensive of all beans in my opinion. They're no too meaty, and they don't really have a taste when they're cooked until soft. I also had a few random chicken breasts and one lonely sausage in my freezer. Yay, Cassoulet!

Chicken, Sausage, and Bean Cassoulet
This recipe gave us dinner for two, and lunch for two.

2 large chicken breasts, diced
1 Italian sausage, cut in thin slices on the diagonal
S+P
1 Tbsp smoked paprika

- sautee in olive oil in a pan until almost cooked through. set aside
- in a large pot, sautee

1 onion, sliced
1-2 large garlic cloves
1 pepper, chopped (who cares what color! just.... maybe avoid green)

- when soft, add

1/3 cup roasted/sundried/diced fresh tomatoes (or same amount of anything tomatoey!)
1 can of beans in some kind of sauce
1 1/2 cups of cooked white beans
3 Tbsp BBQ sauce (or to taste)
Chicken and Sausage mixture

- stir well, then, if it`s pretty dry looking, add 3-4 cups of water.
- bring to a boil, then drop to a simmer until you`re ready to eat!


Wednesday, 29 August 2012

Zucchini Masquerading as Noodles

Looks like a delicious bowl of meaty, tomatoe-y pasta, right? I think not!
The gluten-free kick does not seem to be going away. Obviously we know now that a surprising majority of people are allergic to it to some degree, and now wheat is getting a bad rap and everyone is jumping on-board the gluten-free wagon. This makes me very sad because noodles and bread are some of the most versatile and budget-friendly foods out there. I also happen to believe that in moderation these carbs, while it's true they cannot be considered Health Food, will do you no harm and don't need to be feared. BUT since that kind of thinking can get a person rebuked these days I'll stay away from that and tell you why the gluten-free trend is a good thing. *Insert big dazzling smile here*

Avoiding gluten and carbs in your diet is an excellent way to get more creative in the kitchen, and to learn how to enjoy food in a new way. 
 Is it challenging? Oh heck yes. 
Will you feel like throwing all your pots and pans out the front door in a protest to cooking now and then? Most definitely. 

But if you can keep your emotions under control (and can lend yourself to logging a LOT of web time searching inspiration and recipes) you'll expand your horizons and become a better cook. Boy, all this just to introduce Exhibit A: Zucchini masquerading as noodles. Observe:

Pretty convincing, isn't it?
Now, unfortunately, I also have to sell you on another idea here. The Mandoline. If you've been hiding under a rock and think I'm talking about a musical instrument, allow me to enlighten you: A Mandoline is actually a cooking tool similar to a grater. Often it just has one straight blade for slicing vegetables to a certain thickness/thinness (see: potato chips). Sometimes, though, you can get different attachments that can cut your vegetables julienne (see: french fries) or even thinner, like.... noodle width? (see: below).
If you tilt your head to the left, it's a monster!
 A Mandoline is a very useful kitchen tool, and while it may not seem necessary it can sure save you a lot of time, and allow you to try new recipes like this one. They're not even that expensive! At your regular  grocery store they probably have one or two types for $10-20. As far as quality goes, they will always be super sharp but what you want is one with a blade that can adjust in thickness. A knob is best, but there's also the option of removable plates - this is probably the one that would come with the julienne or crinkle-cut (yes, crinkle cut!) attachments. I really think you should go buy a Mandoline... I really do. From the bottom of my heart. If you're having trouble justifying it, here are some ideas:
- Quickly slices cucumbers for a cucumber salad
- Thinly slice potatoes and beets for homemade chips
- Cut long, thing slices of carrot for coleslaw
- Obviously, cutting zucchini/squash to disguise themselves as spaghetti!
- OR.... cut a zucchini lengthwise and use it as a LASAGNA NOODLE! Say whaaaat?? You heard me. (Read me?)


This was a fantastically delicious and easy summer dinner. It's late summer here in BC, so if you have a garden your probably about to suffocate under a pile of zucchini and tomatoes, so... get your butt to the store and buy some Ricotta!
1) Stir some crushed garlic and salt into your ricotta
2) Slices tomatoes (don't try them on the Mandoline, please - it'll be a massacre) and zucchini (I don't care how good your knife skills are...the Mandolines skills are way better)
3) Stack, and drizzle with olive oil and sprinkle with more salt!

Fresh, healthy, cheap, filling lasagna!


Wednesday, 1 August 2012

Strawberry + Pavlova Trifle

For a light and easy summer dessert to use the last of those strawberries, look no further than a Strawberry Pavlova trifle!!

Ingredients:
Strawberries, sliced and tossed with a bit of sugar
Heavy Cream, whipped and sweetened
Small Meringues, torn

I've found that when it comes to trifle, there are varying opinions on whether it should be mainly whipped cream/pudding, or whether it should be packed full of fruit and cake with the cream only used to make distinctions between layers. Therefore, I'm going to leave the amounts up to you - based on the size of your trifle bowl. But a good place to start is an equal amount of everything, and then discover your own personal taste from there. Delicious!!